
When you’ve ever discovered your self scrolling endlessly via an extended Google Doc, desperately looking for a particular part or piece of knowledge, then you recognize the worth of a well-organized desk of contents. Fortunately, making a desk of contents in Google Docs is a fast and simple course of that may prevent time and frustration.


Sadly, this function isn’t out there for Google Docs on Android. If you wish to insert a desk of contents in your doc, you’ll want to make use of the desktop or iOS variations. Fortunately for you, we’ve assembled a step-by-step information on learn how to create a desk of contents.
Methods to make a desk of contents in Google Docs for desktop
In your desktop PC, launch your browser of alternative and open Google Docs. Subsequent, open a doc that incorporates a number of headings. If the doc doesn’t comprise headings, you’ll be able to’t make a desk of contents.
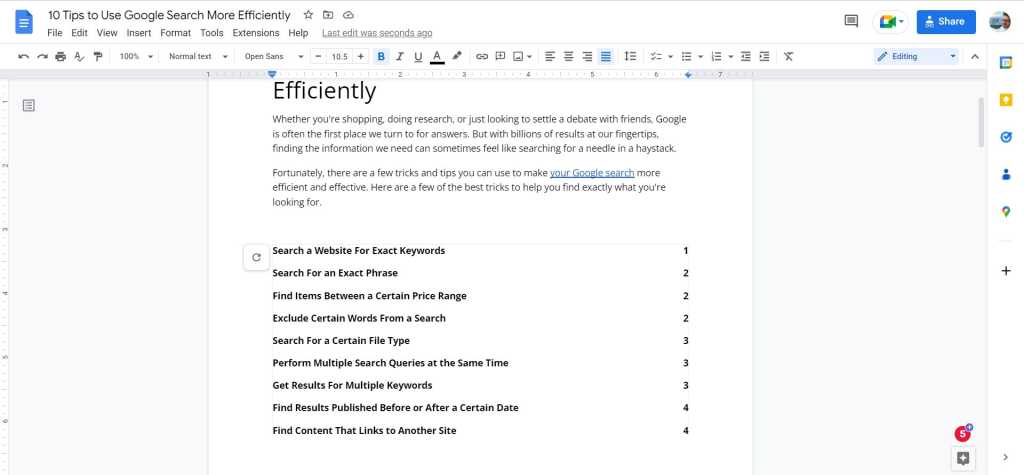
As soon as within the doc, place your cursor on the placement of the web page the place you’d wish to insert a desk of contents. In our instance, we’ll insert the desk of contents after the introduction and simply earlier than the primary heading.
IDG / Marshall Gunnell
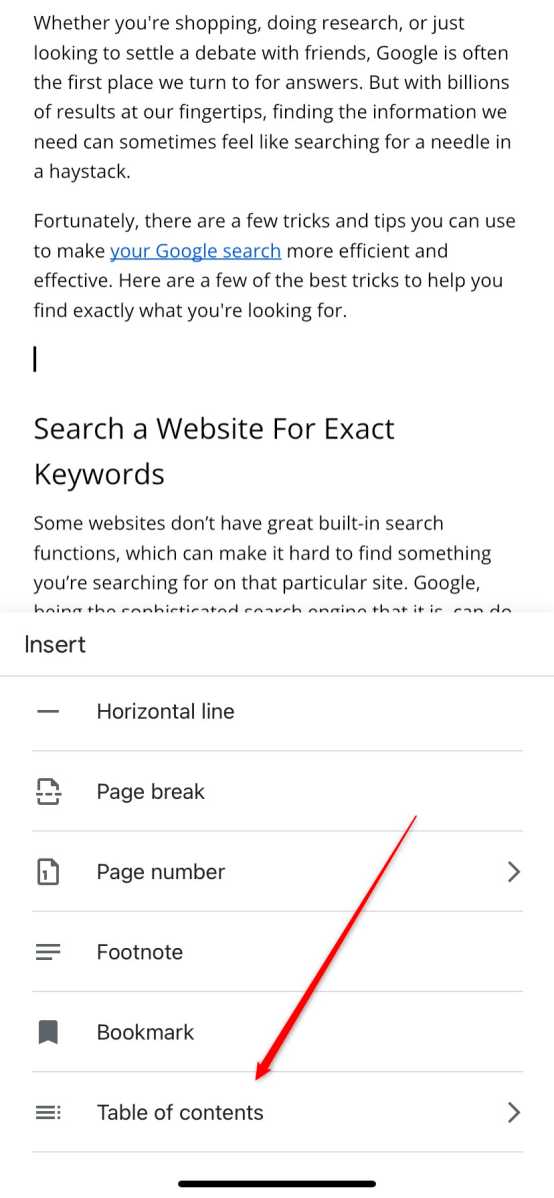
Subsequent, click on Insert within the toolbar on the prime of the display.
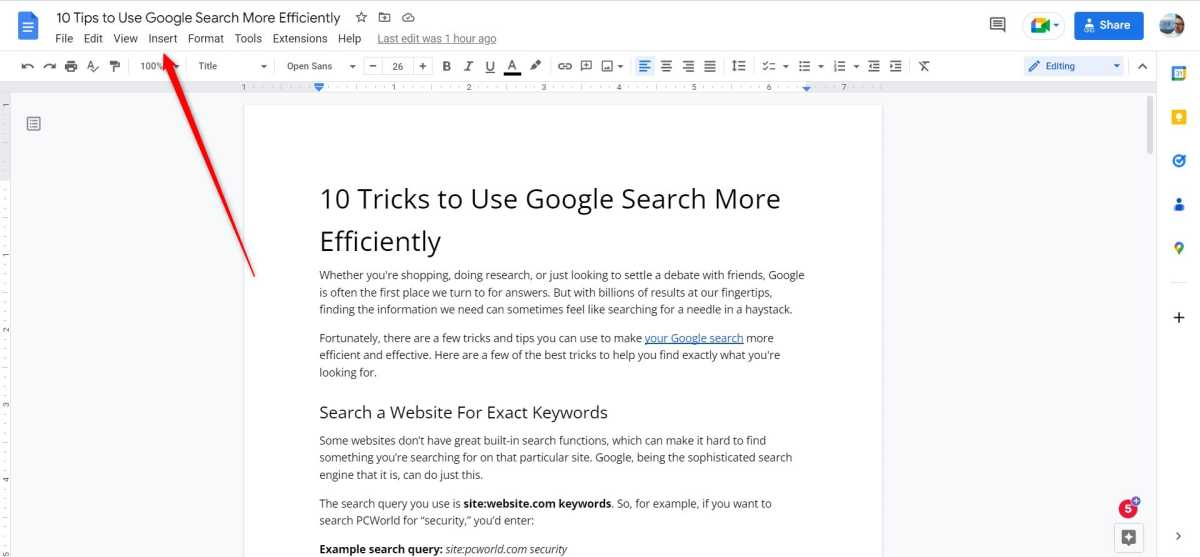
IDG / Marshall Gunnell
Scroll to the underside of the Insert menu and hover your cursor over Desk of contents. A sub-menu will seem with two desk of content material types. You’ll be able to choose both numbered or linked. The numbered desk of contents provides the web page quantity subsequent to the respective heading. The linked desk of contents provides hyperlinks to every heading for fast entry. Choose the desk of contents you wish to insert.
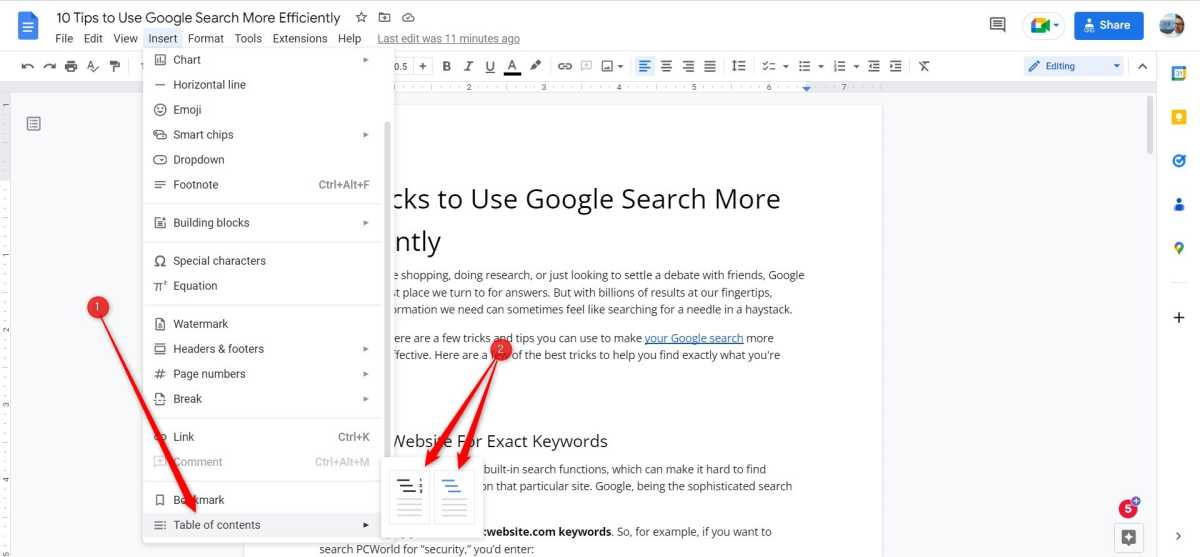
IDG / Marshall Gunnell
The desk of contents is now inserted in your Google Docs doc.
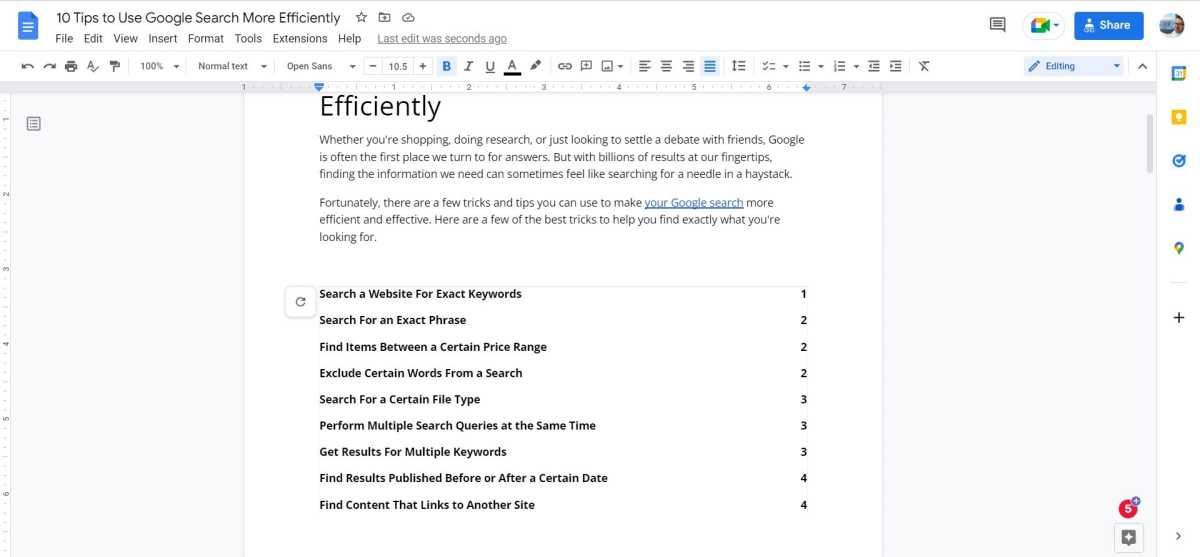
IDG / Marshall Gunnell
When you add extra headings to the doc after you insert the desk of contents, you’ll be able to refresh the desk of contents so as to add the brand new headings by clicking the refresh icon to the left of the desk of contents.
Methods to make a desk of contents in Google Docs for iOS
You can even insert a desk of contents right into a Google Docs doc utilizing an iPhone or iPad. Launch the app in your gadget and open the doc that you just wish to add the desk of contents to.
As soon as within the doc, place the cursor within the spot the place you’d wish to insert the desk of contents by tapping that location in your display. Subsequent, faucet the plus icon, which is the Insert possibility.

IDG / Marshall Gunnell
The Insert pop-up will seem on the backside of the display. Faucet Desk of contents on the backside of the menu.
IDG / Marshall Gunnell
Lastly, choose the kind of desk of contents you wish to insert. You’ll be able to choose With web page numbers, which provides web page numbers subsequent to every heading, or With blue hyperlinks, which provides hyperlinks to every heading for fast entry.

IDG / Marshall Gunnell
The desk of contents is now inserted in your Google Docs doc.