


Professional’s Ranking
Execs
- General the most effective out there Mini-ITX motherboards
- Two onboard M.2 slots, Thunderbolt 4, PCIe 16x Gen 5
- Strong networking and nice audio choices with included Strix Hive
- Fanatic-approved ROG aesthetics and practical design parts corresponding to Q-Latch for M.2 drives
Cons
- $469 MSRP will deter some customers
- Mini-ITX has some inherent limitations attributable to its measurement
- Players may discover some options pointless, corresponding to Thunderbolt 4
Our Verdict
Should you’re seeking to construct the best possible Mini-ITX system doable, then the Asus ROG Strix Z790-I Gaming WiFi is unquestionably the motherboard you’d select. It’s costly and a few of its options will appear superfluous to those that don’t want them, however for the builder who desires all of it in a compact package deal, this small form-factor magnificence has it.
Mini-ITX, or small form-factor, has been all the fad the previous couple of years in PC builds. Who doesn’t need to pack a ridiculous quantity of energy in a small PC case? One may even argue that a part of the enchantment is the problem of maximizing efficiency inside these constraints. Plus, these motherboards are so rattling cute!
If that appears like your cup of tea, you’ll be excited about what the Asus ROG Strix Z790-I Gaming WiFi brings to the desk. That includes help for Intel’s Thirteenth-generation CPUs, it gives a stepped-up degree of “mini” efficiency. It suggestions the scales on pricing, too—however in return you get a wealthy function set and enthusiast-grade chops.
We’ll take a look at this motherboard’s options, design, and efficiency. Mini-ITX has a couple of drawbacks that don’t have an effect on bigger ATX boards, however does this unit make up for that with its beneficiant choices? Let’s discover out!
Additional studying: See our roundup of the most effective gaming motherboards to study competing merchandise.
Thiago Trevisan
What are the Asus ROG Strix Z790-I Gaming WiFi specs?
- Mini-ITX kind issue (170x170mm or 6.7×6.7 inches)
- Helps Intel Twelfth- and Thirteenth-gen CPUs
- 10+1 Energy Stage with 105 amp
- DDR5 RAM, twin channel as much as 2 DIMM (as much as 64GB)
- 2x onboard M.2 slots (1x PCIe Gen 5 and 1x PCIe Gen 4)
- 1x PCIe 16x slot (PCIe Gen 5)
- HDMI port
- 2x Thunderbolt 4 USB-C ports (helps DisplayPort)
- 7x further rear USB ports
- Intel 2.5GbE LAN
- Wi-Fi 6E with Bluetooth 5.3
- Aura Sync header for RGB
- 2 SATA 6Gb/s ports
- 3 PWM fan headers
- Clear CMOS
- Preinstalled I/O protect
- ROG Strix Hive audio exterior machine
- ROG Excessive Definition ALC4050 codec
- ROG FPS II Card
- MSRP $469
The Asus ROG Strix Z790-I Gaming WiFi carries with it an MSRP of $469. That is encroaching on high-end ATX motherboard territory, so it ought to pack a punch for its measurement. You possibly can’t anticipate to get the identical quantity of I/O or PCIe slots as with the larger brethren, however there are many options you do get. In different phrases, you’re going to pay a premium to have so many options squeezed right into a small design. However this board gives the whole lot you’ll want for a monster (err, Mini-monster) gaming PC construct!
Beginning with the unboxing, you’ll uncover a wealthy treasure-trove of bundled equipment. You’ll get the usual SATA cables, NVMe trinkets, and even ROG-branded swag.
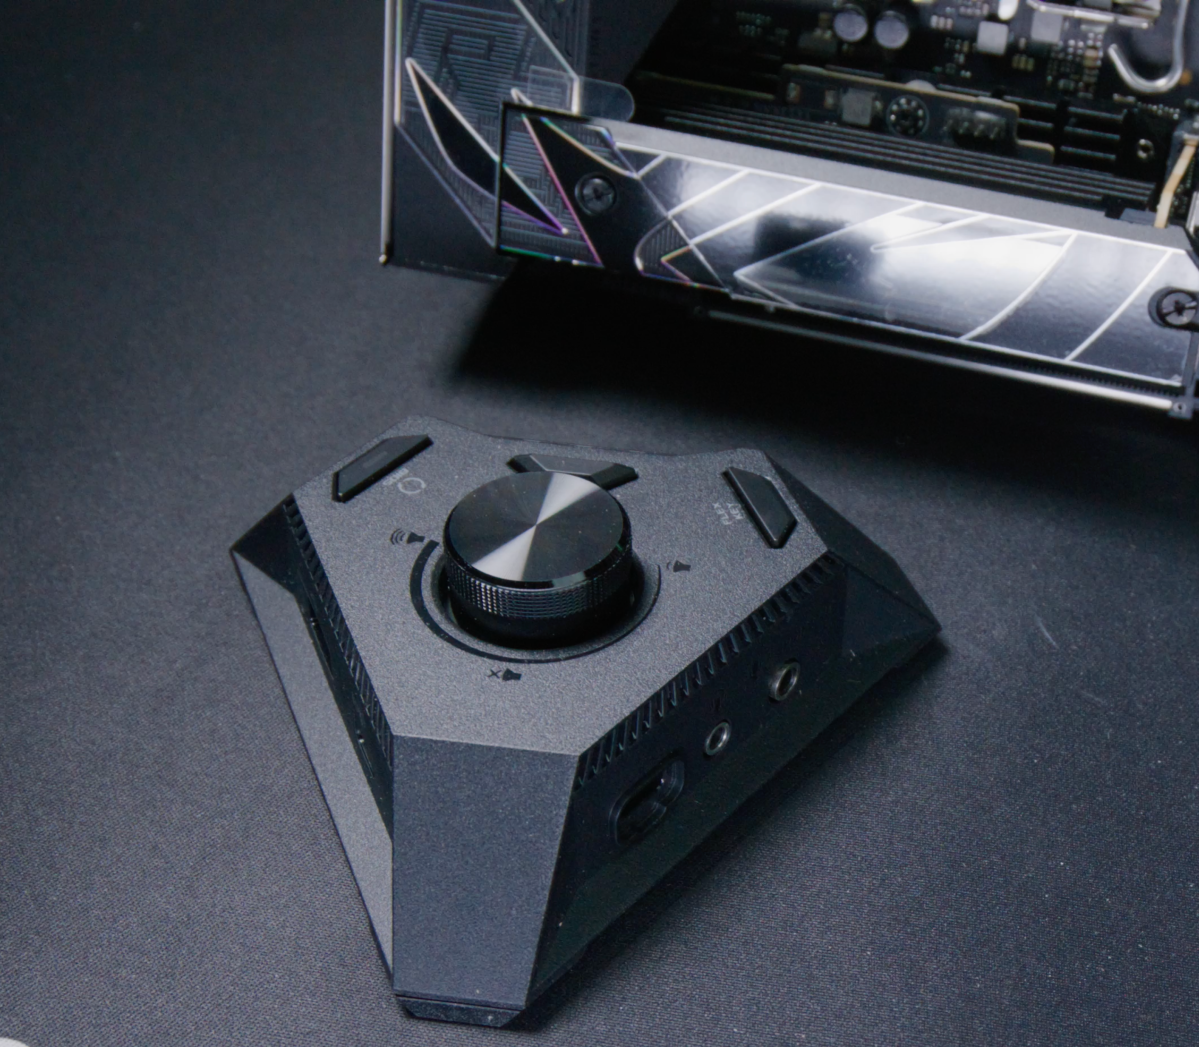
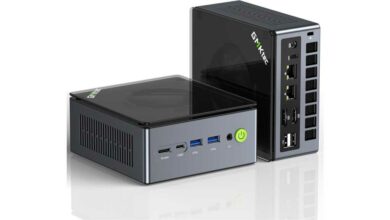
The ROG Strix Hive is an exterior audio accent that comes with the Asus ROG Strix Z790-I Gaming WiFi.
Thiago Trevisan
What you don’t normally see with any motherboard is a bundled exterior sound machine/USB combo. The ROG Strix Hive makes an attempt to resolve the small form-factor area difficulty by providing performance outdoors of the case. It has the whole lot from an audio codec to a quantity enter dial, and even further USB. It even contains some nifty diagnostic options. We applaud this effort to supply add-on performance whereas leaving the board free to maximise efficiency options. The machine pairs properly with this fanatic motherboard.
Going additional, you additionally get a “ROG FPS II” card. This plugs in on to the motherboard, and extends its capabilities to incorporate two SATA ports, and a set of headers. One other sensible solution to hold the primary motherboard targeted on offering very important efficiency, and augmented by such add-on parts.
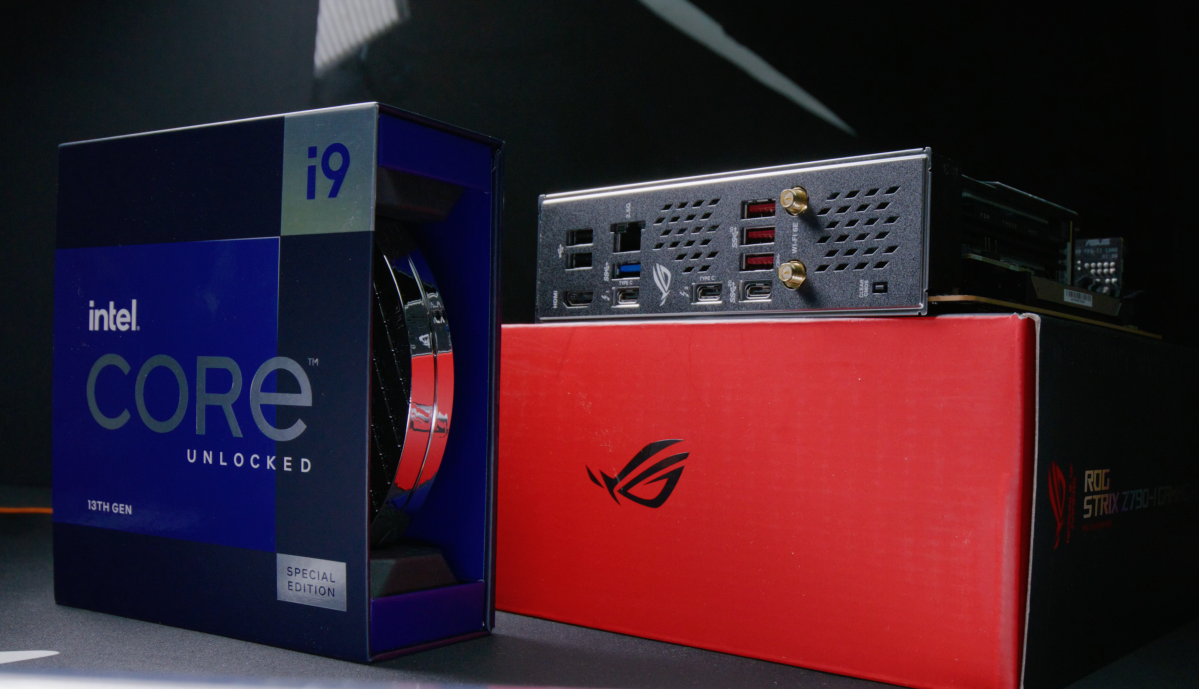
What CPUs are supported?
The Z790 chipset means that you can use each Intel Twelfth- and Thirteenth-generation, providing you with flexibility in your CPU. This explicit motherboard is a mini-enthusiast powerhouse, so there’s a superb probability you need to pair it with a door-busting Intel i7 or i9 such because the 13900K. Even the mighty 13900KS with its 6Ghz speeds ought to do nice right here in case your cooling answer can sustain.
Does it help DDR5 RAM and PCIe Gen 5?
DDR5 help is right here, and also you’re ready to make use of some mighty quick kits, surpassing even what AMD presently gives on AM5. You’ll be restricted to solely 64GB of RAM and two separate slots, nevertheless. That is as a result of board’s diminutive measurement. We determine that’s greater than nice for a gaming construct, and technically two RAM slots typically supply extra stability and efficiency in comparison with 4.
How about PCIe Gen 5? Does a small motherboard like this imply you’re not absolutely coated right here? Under no circumstances! Being Z790, you’re given a PCIe Gen 5 16x slot—just one as a result of area constraints. That’s to your GPU, which could have greater than sufficient headroom for even future releases in comparison with PCIe Gen 4.
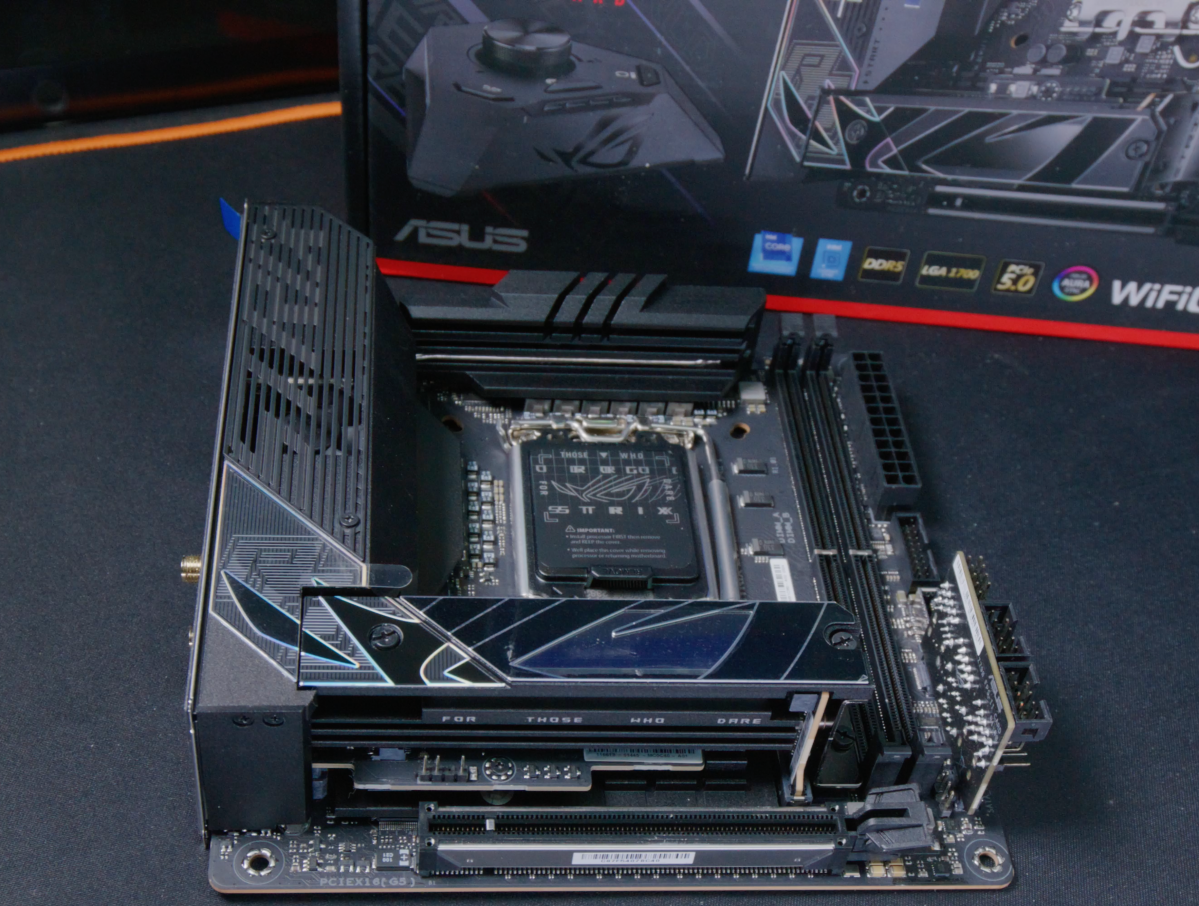
Storage help
The NVMe slot can be PCIe Gen 5. On this regard, the motherboard stands out from the numerous others that cap the NVMe slots at PCIe Gen 4 even when the board helps Gen 5. This will likely be a nice-to-have function going ahead as extra PCIe Gen 5 NVMe drives are launched, letting you’re taking full benefit of the Thirteenth-gen Z790 platform with all the bells and whistles.
Additionally, you will have a second onboard NVMe slot, however this one is PCIe Gen 4. Given that the majority drives barely saturate even this, you’ll be forward of the sport right here.
As talked about, the ROG FPS II card options two SATA ports, which whereas modest in comparison with ATX choices, ought to match the wants of small builds.
We applaud how the Asus ROG Strix Z790-I Gaming WiFi gives add-on performance whereas leaving the board free to maximise efficiency options.

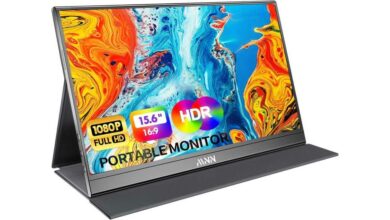
The Asus ROG Strix Z790-I Gaming WiFi comes with nice connectivity for such a small motherboard.
Thiago Trevisan
USB ports
Persevering with with the shocking degree of options, you’re getting 9 complete rear USB ports. That alone is pretty much as good, if not higher than, many ATX motherboards.
Including to that’s one other enthusiast-grade function—two of these ports are Thunderbolt 4. With super-speedy 40Gb/s, Thunderbolt is arguably one of the crucial versatile I/O choices. You should utilize it to attach shows because it helps video over DisplayPort, or join a gamut of obtainable Thunderbolt peripherals and storage drives. In fact, you continue to have a normal HDMI-out as properly in case your CPU helps the iGPU performance.
Networking
WiFi 6E and Intel 2.5GbE LAN are each right here together with Bluetooth 5.3. That’s about as absolutely featured as they arrive—save for some 10GbE LAN hyper-enthusiast motherboards.
Audio
Audio is nice, particularly contemplating the included Strix Hive exterior unit. This will provide you with nice connections which might be at arm’s size as a substitute of solely within the rear I/O of the motherboard. The helpful quantity wheel permits you to shortly regulate audio ranges even should you’re in the midst of a gaming session.
Different options of observe
It’s at all times commendable to see an built-in I/O protect on a motherboard, so kudos. You additionally get Asus’ suite of “Q-Design” options that embody Q-DIMM, Q-Launch for straightforward GPU entry, and Q-Latch for M.2 screwless installs.
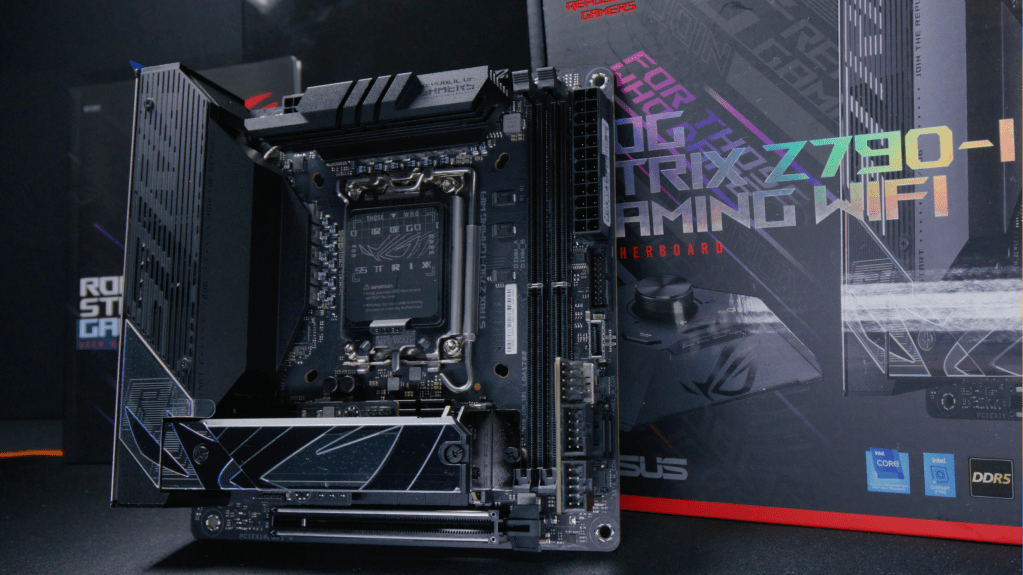
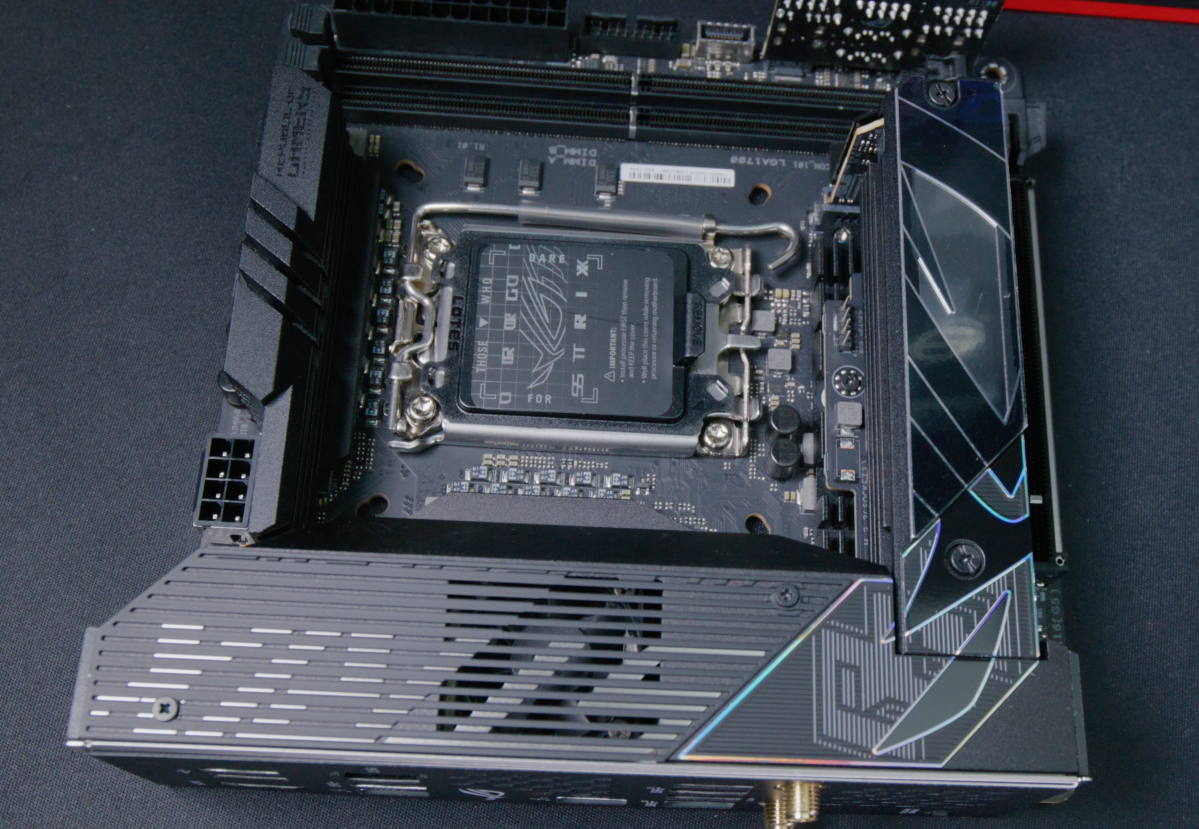
Asus ROG Strix Z790-I Gaming WiFi design
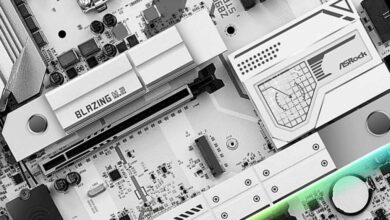
The Asus ROG Strix Z790-I Gaming WiFi is expertly designed, even should you’ll cram it in a small case the place it may well’t be seen.
Thiago Trevisan
The Asus ROG Strix Z790-I Gaming WiFi will impress proper off the bat. Its small measurement already attracts consideration. Whenever you begin to have a look at how detailed the design is right here, it’s spectacular how the compact measurement has been maximized. It’s unhappy that this magnificence will seemingly be buried inside a smaller, cramped Mini-ITX case that has minimal, if any, window area.
Each iota of the board’s floor sports activities practical and aesthetically pleasing touches. Beginning within the I/O protect space, you’re introduced with Strix branding in a monochromatic theme. To intensify that, you may have a really tasteful “pop of color” with some elegant RGB design that just about appears to mirror off of the totally different surfaces. The PCIe slot space continues in the identical vein, with practical M.2 armor trying dapper.
Should you want extra RGB, you’re ready so as to add it by means of the Aura Sync 3-pin or 4-pin headers. This exterior performance add-on, whereas not as helpful because the neat Strix Hive and FPS II playing cards, remains to be good to have. Whereas small form-factor instances don’t supply the identical alternatives for RGB goodness as bigger instances, you’re nonetheless more likely to want the headers to energy issues like CPU and GPU water blocks, and even RGB followers.
You’re additionally getting nice quality-of-life design inclusions—with the M.2 Q-Latch, GPU Q-Launch, and so on. These make the construct and upkeep expertise second to none. It’s much more essential in small form-factor builds, the place entry may be a lot tighter for inner adjustments afterward.
Asus ROG Strix Z790-I Gaming WiFi efficiency, software program, and BIOS
The Asus ROG Strix Z790-i Gaming WiFi has a ten+1 VRM Energy Stage with 105 amps. Meaning it may well handily care for even the mighty Intel i9 13900KS, in case your CPU cooling answer is as much as the duty. You may not be getting the identical theoretical degree of VRM cooling as with some ATX motherboards just like the Asus ROG Maximus Z790 Hero. However in follow, this board gives top-notch CPU efficiency in a small form-factor, and comes very near many bigger fanatic motherboards.
The motherboard will hold cool with its imposing VRM answer. Your greater problem will likely be correctly cooling among the i9 CPUs in a small enclosure, as lots of them desire 360mm AIO liquid coolers, which may solely be a “custom fit” in most small PC instances.
So as to add to your quick CPU, you’ll be capable of make the most of the quick efficiency of DDR5 RAM, with a wonderful reminiscence controller onboard.
PCIe Gen 5 is for the GPU 16x slot, and for the NVMe M.2 slot. Hyper-fast Gen 5 drives are simply hitting the market, that means this small motherboard will likely be among the many tiniest to wield such speeds. Whilst you’ll even be nice with the second Gen 4 onboard slot, it’s good to know that this premium motherboard takes benefit of what the platform has to supply. You’ll cool these drives with the M.2 stacked armor cowl and thermal pads.
Thiago Trevisan
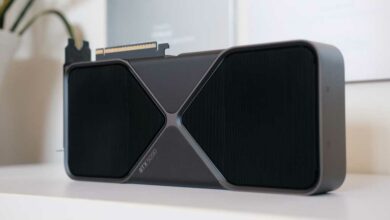
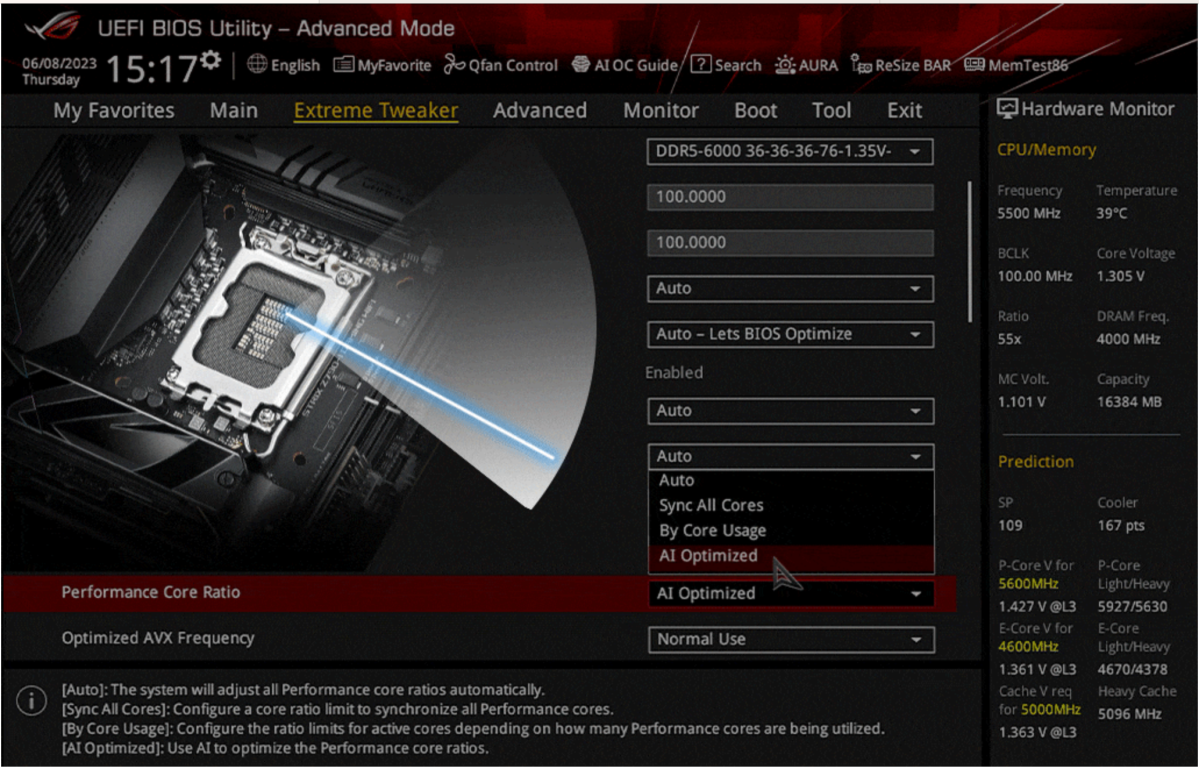
Since that is an enthusiast-grade motherboard, you’ll discover the BIOS is a good expertise. The Asus BIOS continues to be the most effective within the business, with clear navigation and loads of tinker-points so that you can meddle with.
Asus
BIOS updates may be executed by way of the BIOS itself, making it pretty easy. It’s additionally full of “AI,” or computerized overclocking instruments for the CPU, and the standard XMP profiles. The AI overclocking instruments may even get a learn on the cooling efficiency of your CPU cooler and regulate the optimum overclock accordingly.
Customers be cautious, nevertheless: It’s at all times greatest to know precisely what your settings are doing, and diligently monitor CPU temperatures for abnormalities. Even “AI” instruments, pretty much as good as they’ve change into, can nonetheless generally fall wanting setting the whole lot ideally. For everybody else, you possibly can simply depart it on “Auto” and it’ll do the remainder.
Should you’d desire to stay to Home windows for many different duties after setting the fundamental XMP settings, you may have the Asus Armoury Crate software program.
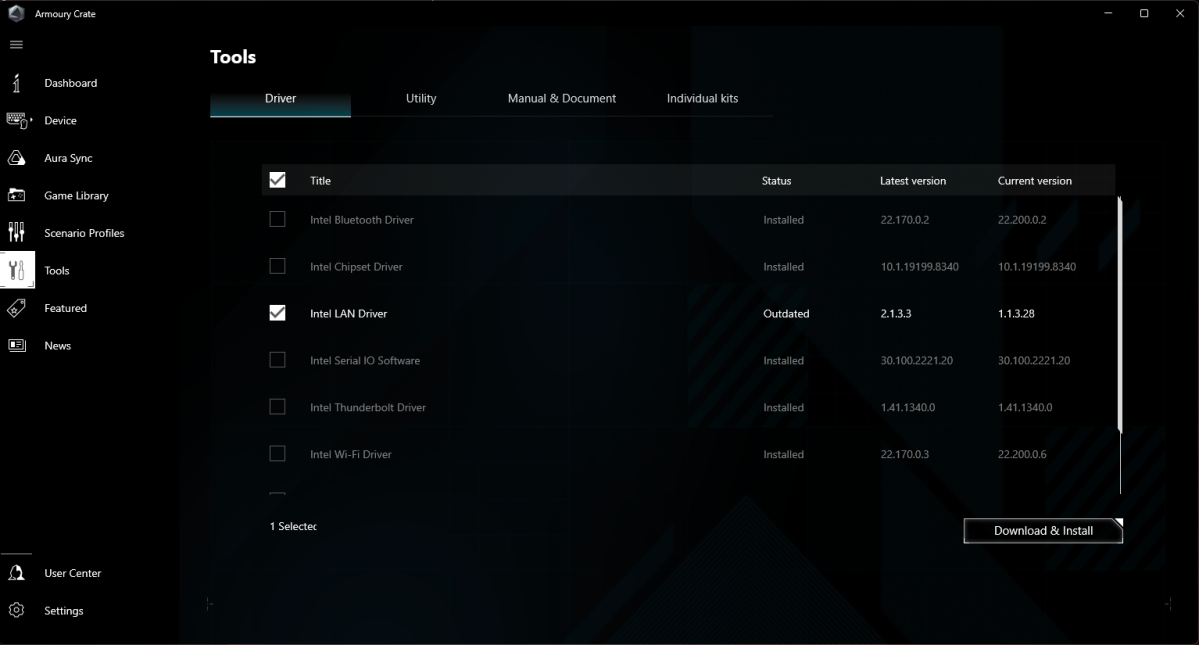
Asus Armory Crate software program’s driver updates.
Asus
Motherboard software program has been rather more secure and feature-rich the previous couple of generations, and this one is not any exception. It has a bevy of feature-rich choices to interact with. A few of them embody “Fan Xpert” for fan profiles, “Aura Sync” for RGB customization, and even driver updates.

Asus Armoury Crate Software program’s Aura Sync RGB.
Thiago Trevisan
The brute drive efficiency of the motherboard is roofed, how about I/O speeds? Thunderbolt 4, a rarity on any motherboard is right here with two slots. It is a nice boon for customers who want peripherals linked or simply super-fast storage. 40Gb/s is quick—the truth is the quickest you will get in the meanwhile for USB degree transfers.
Are there drawbacks for efficiency? Whereas Asus has executed a stellar job packing in as a lot as doable, it’s nonetheless a small form-factor unit. This has inherent bodily limitations, all whereas nonetheless commanding a premium value. You’ll discover beefier VRMs and extra DDR5 slots, for instance, on comparable ATX motherboards.
Should you’re keen to reside with a couple of small compromises, the efficiency supplied right here is completely top-shelf with little or no draw back.
Is the Asus ROG Strix Z790-I Gaming WiFi value it?
So that you’ve fallen in love with small form-factor builds, and need to construct the best possible system you can? Fortunate for you – the Asus ROG Strix Z790-I Gaming WiFi is the most effective, most absolutely featured Mini-ITX motherboard you should buy.
It gives a dizzying array of options corresponding to Thunderbolt 4, PCIe Gen 5 NVMe slot, and funky extras such because the Strix Hive exterior card. It additionally gives nice efficiency when it comes to VRMs and DDR5 for its measurement, permitting you to pair it with an i9 CPU.
It’s expensive at $469, nevertheless. Though it’s technically the most effective, there are some customers who can do with a much less feature-rich Mini-ITX motherboard and avoid wasting bucks. For instance, not everybody wants Thunderbolt 4, or the blistering efficiency of an i9 CPU. (The Asus ROG Strix B760-I Gaming WiFi can be one such instance of a $219 MSRP different for individuals who don’t must overclock or have these further options.)
If you’d like the most effective cash can purchase within the Mini-ITX realm, the Asus ROG Strix Z790-I Gaming WiFi is a wonderful selection.