 We construct this climate monitoring system utilizing Arduino that gives data comparable to temperature and humidity on a shade touch-screen show. It might additionally management the temperature via the touch-screen consumer interface when it exceeds the set threshold stage.


The challenge may be simply transformed to a private climate station by including extra sensors to measure climate circumstances open air or indoors.
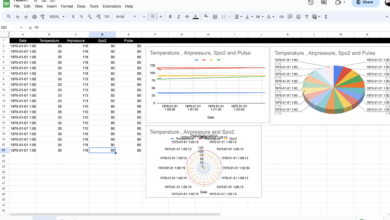
The digital console gives simple readouts of the info collected by the sensor. The touch-screen has a microSD card reminiscence slot. So, it may be related to a private pc the place knowledge may be displayed, saved, and uploaded to web sites, or used for knowledge ingestion or distribution techniques.
Under you may see the demo video of this climate station challenge…
DIY Climate Station Required Parts
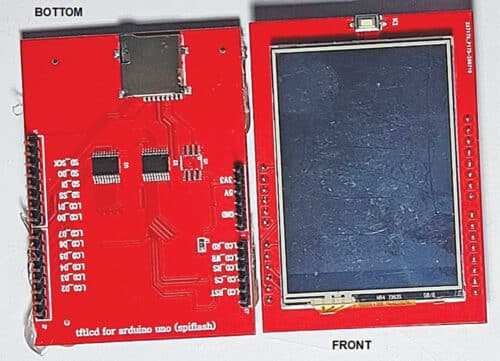
TFT Touchscreen Show
The 6cm TFT touch-screen show TS1 is mainly an Arduino protect, which may be mounted on prime of the Arduino Uno board. This is among the benefits of this show since you don’t want any exterior wires to interface with Arduino.
Now we have beforehand mentioned tips on how to use TFT show with Arduino.
Arduino Uno
It’s the coronary heart of the challenge. Temperature and humidity knowledge, TFT contact enter show, and system management inputs are processed via Arduino programming.
DHT22
This temperature and humidity sensor offers extra correct readings as in comparison with the favored DHT11 sensor. With this sensor, you may simply program to get humidity in %, and temperature in °C and °F models. On this challenge, its output pin is related to pin 11 of the Arduino board.
DHT22 sensor can both be bought as a sensor or as a module. The sensor comes as a 4-pin package deal out of which solely three pins are used. The module comes as a 3-pin package deal, as proven beneath.
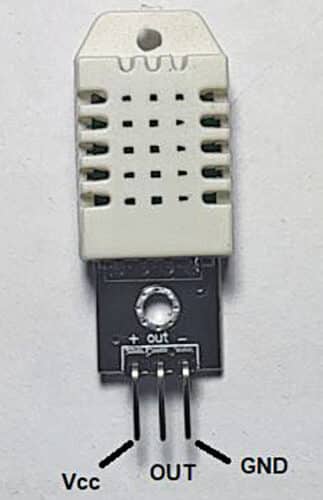
The module has a filtering capacitor and pull-up resistor inbuilt, however for the sensor, you should use them externally, if required. In any other case, the efficiency of each is identical. The sensor can be manufacturing facility calibrated and therefore simple to interface with microcontrollers. It might measure temperature from -40°C to +80°C and humidity from 0% to 100%.
BC548
This well-liked bipolar NPN transistor is used as a driver for switching {the electrical} equipment related throughout the relay module.
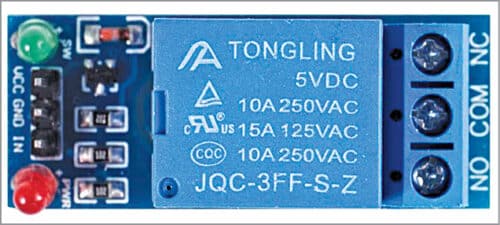
Relay Module
This electromechanical sugar-cube, a single-channel relay is used to change on/off {the electrical} system related throughout its COM and NO terminals. You need to use a available single-channel relay module. In that case, you may join digital pin 11 of Arduino to IN pin of the relay module.
Climate Monitoring System Circuit Diagram
The circuit diagram of the climate station with system management is proven beneath. It includes Arduino Uno Board, DHT22 temperature and humidity sensor, BC548 transistor T1, a 5V single changeover relay, light-emitting diode LED1, and resistors R1 and R2.
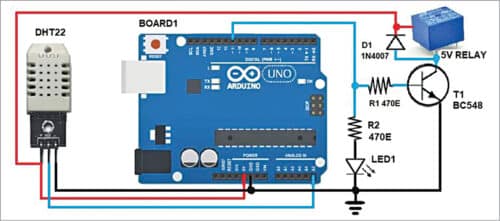
A 9V-12V DC energy provide is used to energy the Arduino board. The 5V provide from the Arduino board powers the touch-screen, DHT22 sensor, and BC548 system driver sections.
Arduino Climate Station Code
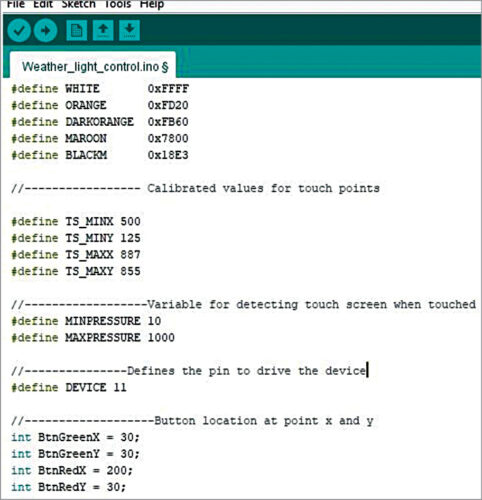
The code (weather_light_control.ino) for this challenge is written in Arduino programming language. The challenge requires particular libraries for DHT22 and a touch-screen show comparable to DHT.h, SPFD5408_Adafruit_GFX.h, SPFD5408_Adafruit_TFTLCD.h, and SPFD5408_TouchScreen.h
One of many challenges within the challenge is calibrating the contact factors within the touch-screen show.
Relying on the mannequin and measurement of the touch-screen show, you might want to calibrate the x and y coordinates. The calibrated values within the code utilized by the creator are proven beneath.
Obtain Supply Code
Climate Monitoring System Working
After importing the code to the Arduino Uno board, mount the TFT touch-screen on prime of the Arduino board via the header pins already offered on the Arduino board. You possibly can fastidiously place it with a slight push on the touch-screen from the highest. Guarantee the proper positions of the male header pins from the touch-screen show are inserted into the corresponding feminine pins on the Arduino board.
Now you may join the board to the USB port of your PC/laptop computer or use a 9V-12V DC provide.
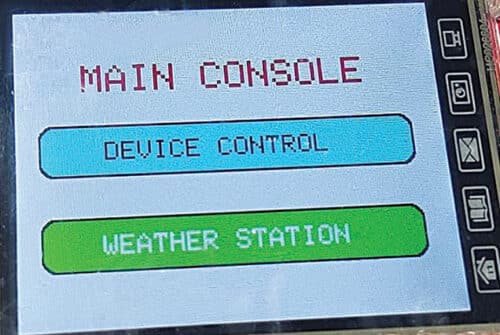
The working of the circuit is straightforward. After importing the code to the Arduino Uno board and connecting all of the parts, as proven within the circuit, swap on the circuit. You will notice the primary panel on the TFT touch-screen, as proven beneath. Contact the System Management choice utilizing a stylus or your fingertip, to activate or flip off the equipment/system comparable to a tube mild or air-conditioner. In any other case, contact on the Climate Station choice to verify the present temperature and humidity.
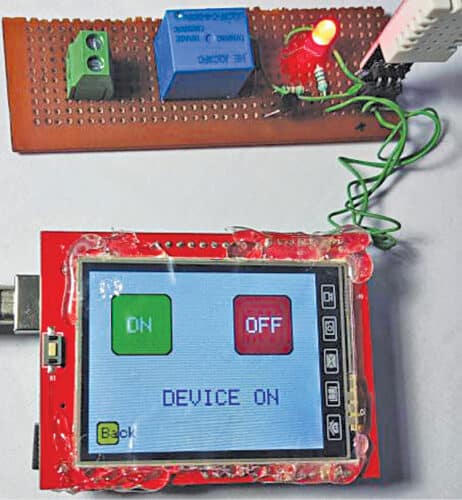
To manage the system, comparable to the sunshine or air-conditioner related throughout the relay, contact the ‘Device Control’ choice. There are on and off buttons within the System Management part, as proven in Fig. 8. If you contact the ‘on’ button, the LED will glow and on the identical time {the electrical} system/equipment related throughout the relay will activate. Contact the ‘off’ button to show it off.
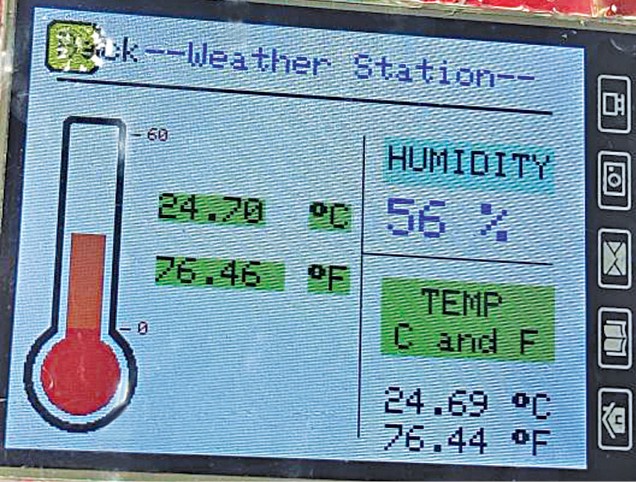
In case you contact the ‘Weather Station’ choice, it can take you to a different display, as proven beneath. You possibly can see the present humidity and temperature values captured by the DHT22 sensor.
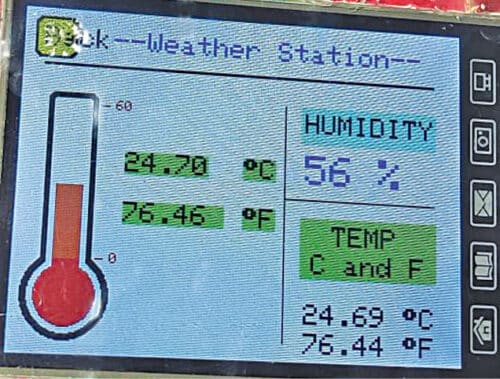
The humidity right here is mainly the relative humidity expressed in share, which represents the quantity of water vapor within the air at a given temperature in contrast with the utmost potential water vapor at that very same temperature. Right here the temperature values are learn in each °C and °F models. So, no conversion is required.
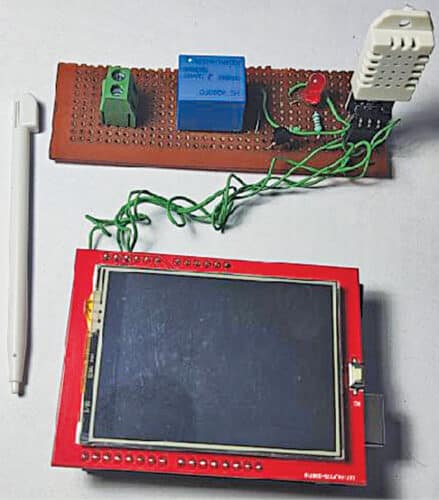
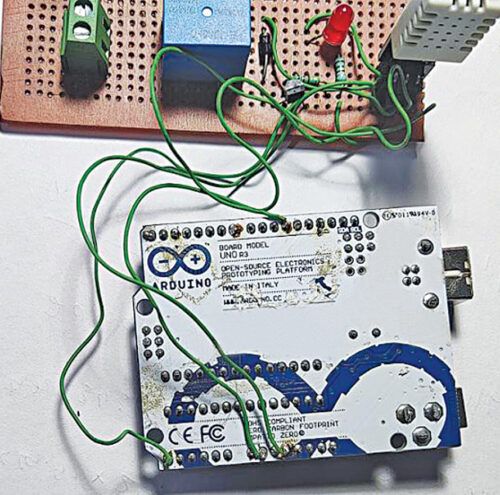
Development and Testing
The circuit may be assembled on a breadboard or Veroboard. We used a 10x3cm Veroboard to mount the relay, sensor, transistor, LED, 2-pin terminal connector (non-compulsory), and two resistors.
Since a lot of the Arduino pins are utilized by the TFT touch-screen show, you want exterior wires to solder at digital pin 11 of Arduino for the relay driver and analog pin A5 for the DHT22.
You additionally must solder 5V and GND pins of Arduino for energy provide to the Veroboard. In case you are utilizing the DHT22 sensor as an alternative of the module, be sure to join a 5-kilo-ohm pull-up resistor at its output pin, in any other case, chances are you’ll not get the proper temperature and humidity readings.
Additionally, be aware that some 6cm TFT touch-screen shows could not work. So, it is suggested to make use of the mannequin that we used right here. If you wish to management an equipment like a cooler or AC, you might want to change the sugar-cube relay with a high-power relay having contact rankings above 16A.
So that is how one can make your individual touchscreen climate monitoring system utilizing Arduino.
In case you have any doubts or face any points/errors whereas making this challenge, please be happy to ask within the remark part beneath.
You can too focus on with the neighborhood of electronics specialists by way of our Discussion board.